- Fountain Pens
Full Size - Fountain Pens
Midi Size - Fountain Pens
Mini / Pocket - Fountain Pens
w-Metal Bands - Fountain Pens
w-Acrylic Bands - Other
Pens/Pcls - Desk
Pens - Other
Items - Contact
& Info
![]() March 2024 - BCHR Style Pen Engraving!
March 2024 - BCHR Style Pen Engraving!
This is a project I've been working on for a while and it's finally ready to offer as a new pen embellishment. I'm sure most pen enthusiast are familiar with BCHR pens. But if you're not, here's a short primer: BCHR stands for 'Black Chased Hard Rubber'. Black stands for the material color (black); Chased stands for the embellishment; and HR stands for Hard Rubber. These days we use Ebonite as the generic term when referring to hard rubber (Ebonite though is like Kleenex. It's a brand name that has become the generic term for all similar products. So to, Ebonite is usually used as a generic term for any brand of hard rubber). The 'Chased' part of BCHR is a machining process that uses metal rollers to emboss or imprint a pattern on hard rubber. Some of the old machines are still around and used. And some pen companies have started to revive BCHR. But as small laser engravers became popular, I began to wonder if I could create BCHR embellishments with a laser engraver. So after researching (and procrastinating) for a few years, I finally decided to buy an engraver to find out for myself. And... it turns out BCHR embellishments can be done with a laser! And after a few months of learning the machine, and a bunch of testing, I was finally ready to try creating some engraving patterns, And once I got into it I found that it's actually pretty easy if you have the means of creating the patterns.
And as it turns out, there are a few advantages to using a laser for the BCHR style embellishing process. First is the Material. Chasing was only possible on ebonite because it was soft enough to press the image into the material (heat was also used). But a laser engraver is burning the image, so it allows for a wider variety of materials (even on cookies!). So besides hard rubber, you can also use a variety of hard acrylics. Another advantage is that it's much easier to go from a pattern concept to the pen. With chasing, the pattern had to be created (and this was back before computers). Next was the expensive process of turning the concept from paper through all the steps to get the metal pressing dies. And back then, it was a fairly long and expensive process to make the dies. With laser engraving, you create the pattern on the computer and then send the design directly to the engraver and onto the pen.
Laser restrictions... Their are a few restrictions however depending on the type of laser used. The first is the COLOR of the material. Some laser use colored lasers (such as blue). So you can't use material of the same color because it will just absorb the laser light. I'm (currently) using a BLUE diode laser. So with this type of laser, I can't engrave on the same color material (blue) because the blue material will just absorb the blue light. Another issue with all lasers is with using reflective materials. Lasers work by directing the laser beam with a series of mirrors. So reflective materials will just redirect the beam and bounce off. So reflective acrylics are a no no for any type of laser engraving.
Types of Acrylic... I found acrylic acetate works the best. Followed by black polyester, then Alumilite. Acrylic acetate is the hardest of the three, so the settings were easier to control. Alumilite is the softest, and since it's custom made (mixed by many independent blank makers), each batch requires testing to find the right settings for that particular batch.
Laser size... Another thing to consider if you want to create your own pattern is that the lasers' beam is quite small--most are only about 0.05mm diameter. So the lines they create are very thin (see the harbor pole pattern below). This can be an advantage or a disadvantage depending on the pattern you want to engrave. The advantage is that you can get great detail in a pattern or image. But it can be a disadvantage by burning a line that is too thin for a particular pattern. But that can be overcome by doubling the lines which will then make two lines appear as a thicker single line. I also found I can adjust the lines per-inch (LPI). This is helpful for creating a pattern where you actually want to see lines. A good example is the vintage BCHR patterns. Those were all created pressing a series of lines into the pens that together created the pattern. So to get the same effect with a laser, you can either create the pattern with individual lines, or create the pattern with what is called 'fill' boxes, and then widen the LPI so the lines show in the pattern instead of creating a solid fill pattern. I used this technique with the first (scallop) pattern below. The laser's default setting filled in the scallops. But by decreasing the LPI, I was able to opened up a gap between the lines so the pattern looks more like the original chased pattern. But if you want the pattern to be solid, just increase the LPI so the lines are closer. And because the lines are thin, when engraving patterns with solid areas, it takes several passes to fill in the areas, which increases the engraving time.
Pen size and shape... Because the engraving line is so thin, you can engrave on large and small pens. But the SHAPE of the part is important. A laser beam is focused to concentrated it's maximum strength on the surface of the part. So if a part has different diameters creating a variation in the depth of the focused area, the beam will get out of focus. This can cause the line to get wider, or if the deviation is too great, the engraving will taper off and stop. So pens with straight parts are best candidates for engraving.
More than just patterns... One final thing to keep in mind is that the engravings aren't limited to patterns. Text and images could also be used as well. I'm working on a few examples that I hope to post in the near future. And if you want the pattern to stand out it could be filled in with a contrasting color.
I've researched BCHR patterns and found most of the very early patterns were all pretty much the same (most likely due to the expense required for making the metal dies as I mentioned earlier). It's also possible it was a service being offered to pen manufacturers and the patterns they offered were limited in the beginning. Then as the chasing became popular, more patterns were created. For example, I found that Sheaffer had sold a series of different chased patterns in their No-Nonsense pen line (so far I found seven). Then as colored acrylics became available, BCHR waned in favor of the bright acrylic colors. But now more recently, more pen companies have been introducing limited edition chased style pens. Most only make one of two for special occasions. But Conway Stewart for example has been offering the patterns on a fairly regular basis in several limited edition series.
Below are a few pens with just some of the patterns I've created. Because the patterns are black on black, it was hard to get good contrast for the patterns to stand out. I switched to a black background, then fiddle with exposure settings (which is why the clips and bands are so bright). But I think you can get a good idea of what's possible. I have other patterns that I just ran on round blanks to get small samples. So if this type of embellishment sparks your interest, please send me an email!
(Click each photo for larger views)
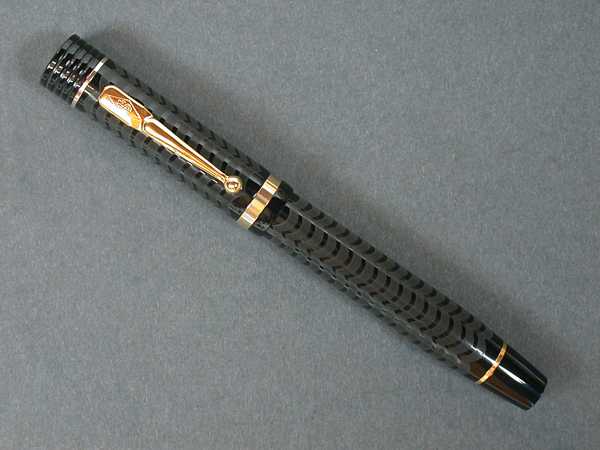
JEB's Churchill with Scallop Pattern
I think this was
a popular pattern because I found several pen companies used it.
|
 |
 |
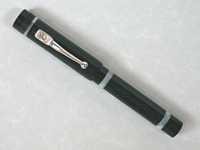
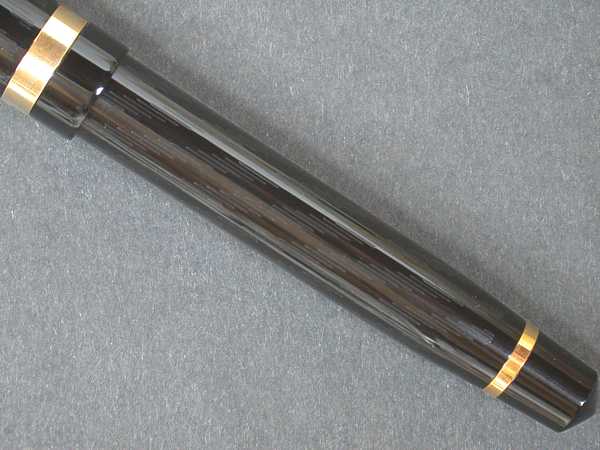
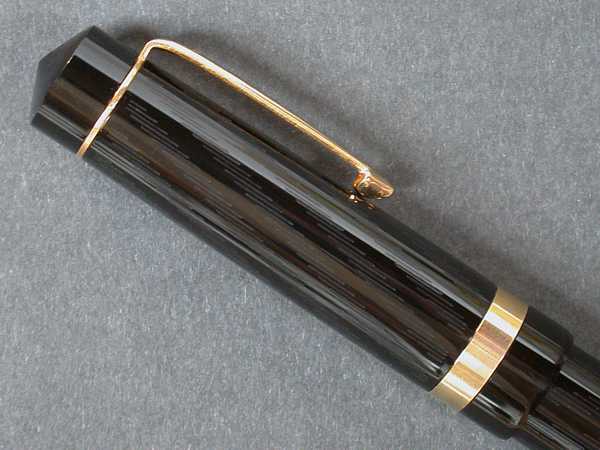
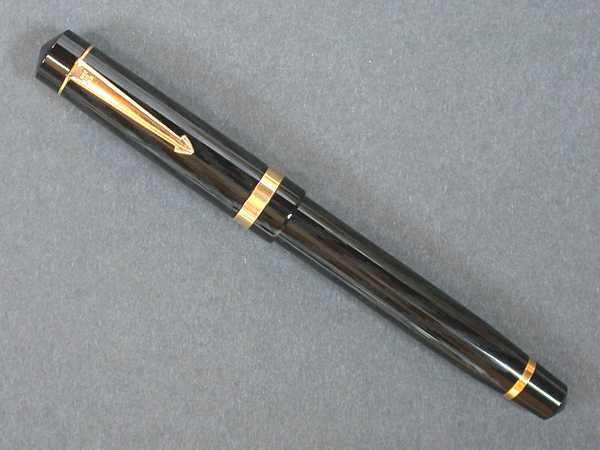
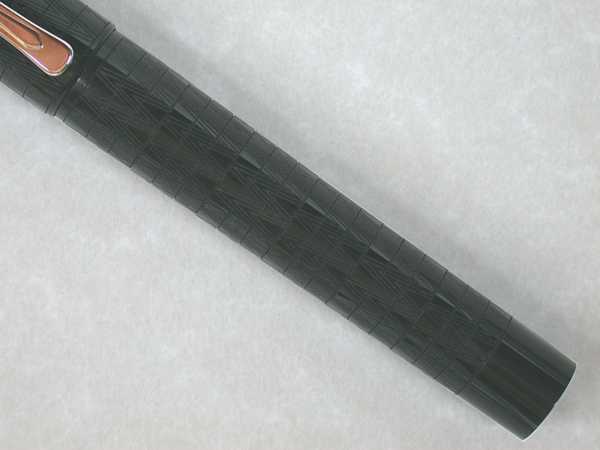
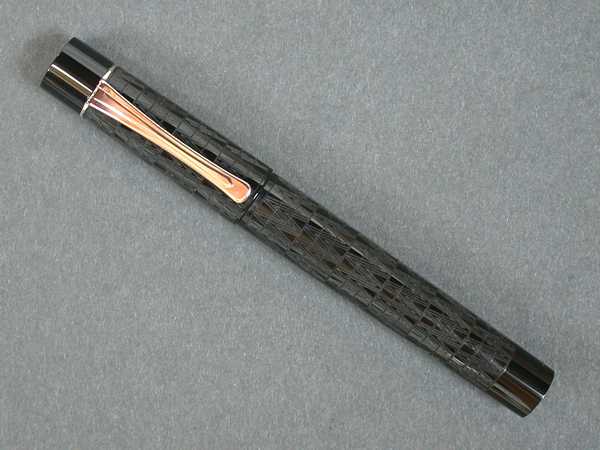
JEB's Nelson with Barber Pole Pattern
Like some of the early BCHR patterns,
this pattern is subtle. So it gives you a little flair
without getting too gaudy. But if you want it to stand out more, it could be made with double
lines making a single line appear thicker. Its not immediately noticeable, but the pattern is reversed
on
the cap (from the direction on the barrel). I mounted the cap in the opposite direction from the
barrel,
so I thought I had to
reverse the pattern as well. But it turns out I didn't need to. A learning
experience, I thought I'd share. This Nelson's cap diameter is .59", and the barrel diameter is .515".
|
 |
 |
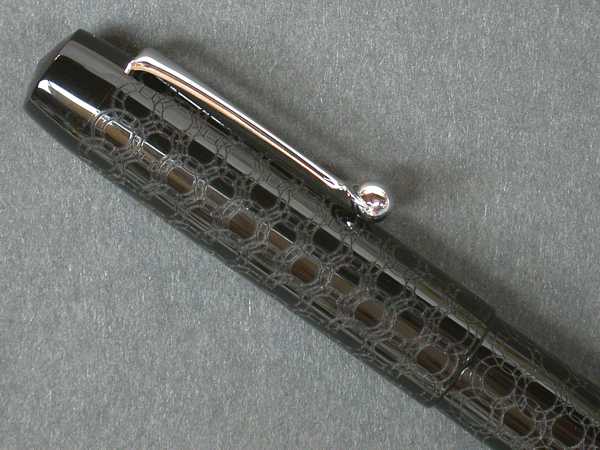
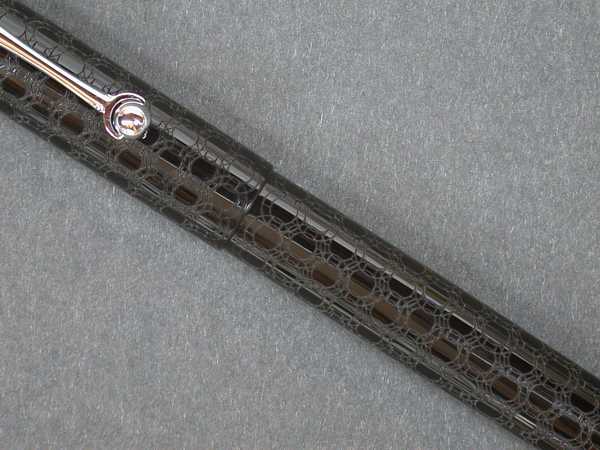
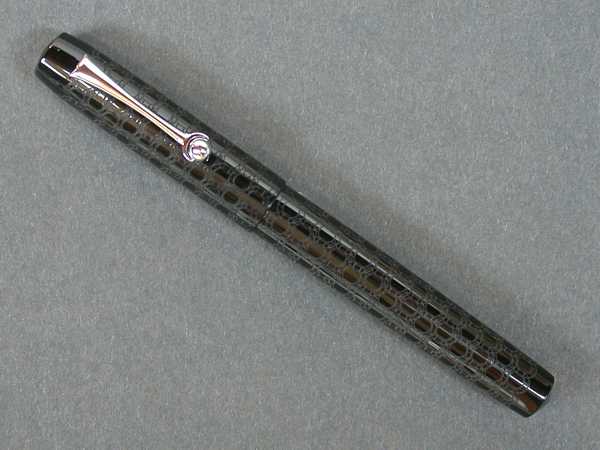
JEB's Dira with Circle Pattern
This is a pattern I found on a CS pen that I thought was pretty cool. It's a good example of how
how intricate a laser engraved pattern can be on a small part, with the lasers thin line being an advantage.
This Dira's cap diameter is .55", and the barrel diameter is .515".
|
 |
 |
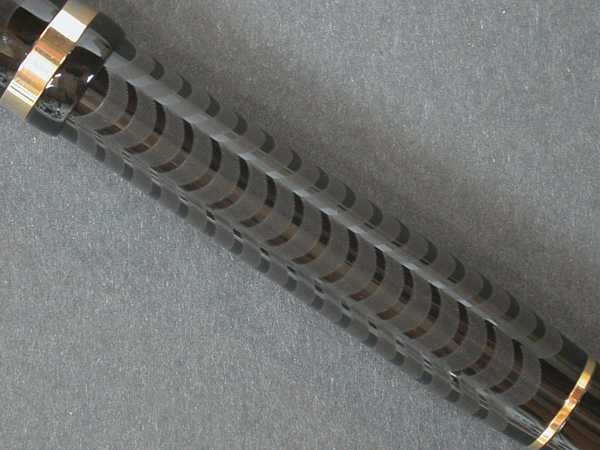
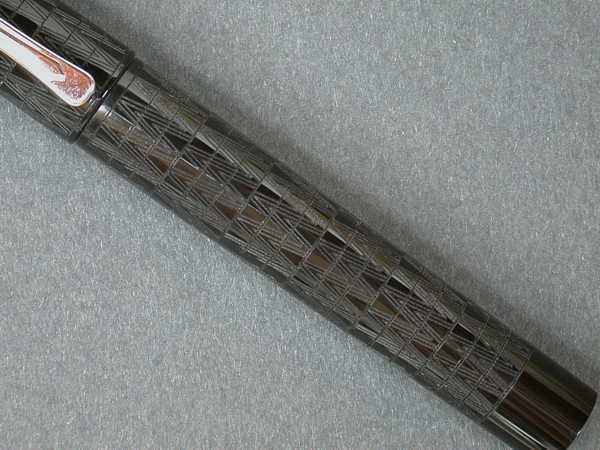
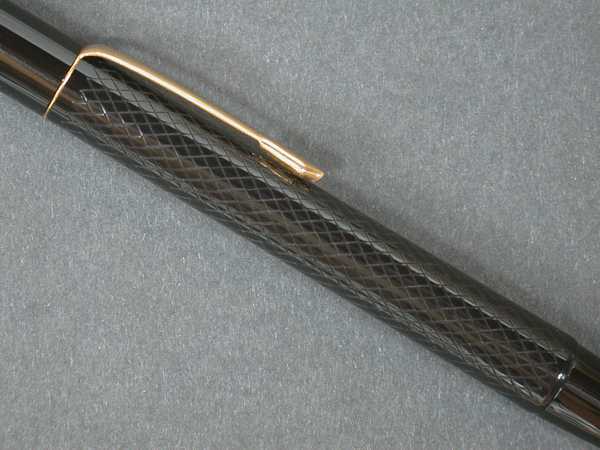
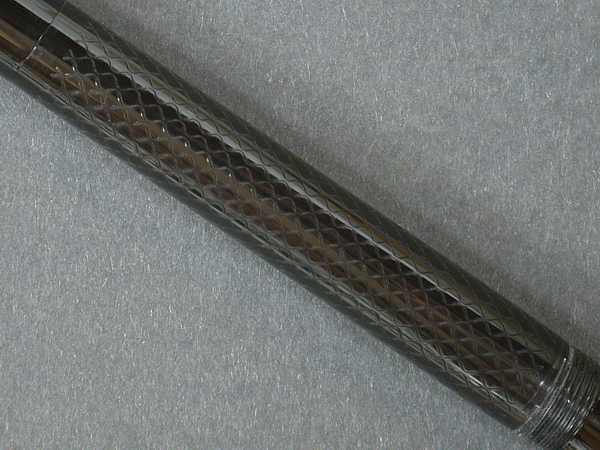
JEB's (short) Nazca with V Pattern
This is another pattern I found on a group of CS pens. It's another good example of how
intricate the pattern can be on a small pen. Although the pattern itself is the same as on the CS pens,
I'm not sure the effect was the same. On their pens the pattern looked like it had more
depth. But it could have just been the way they took their photo's.
This Nazca's cap diameter is .595", and the barrel diameter is .567".
|
 |
 |
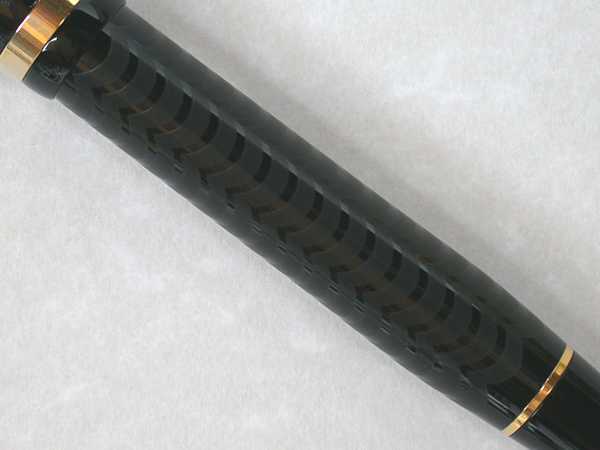
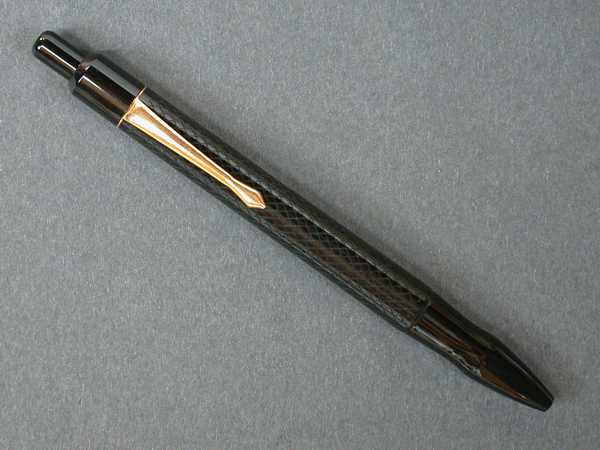
JEB's Clicker Pens with Check and Wavy Patterns
Here are two good examples of how a simple pattern can ramp up the look of a simple clicker pen.
The first two images are a simple gun stock style check pattern made with rows of X's. The pattern
in the third image
is very similar but was made by connecting a row of half circles with every other
one
flipped. The pattern was used on an Onoto Magna.
The barrels dia's are about .47" at the base.
|
 |
 |
Other BCHR Style Examples
Below are links to other BCHR style pens.
|
 |
| Doctor Theme BCHR Style Pen |